Kernel Development Flow
Developing a kernel
Before proceeding, make sure you read the A Conceptual View section.
Scope of this section
This section does not directly discuss how to write your kernel using a CSL program. However, you should read this section to understand, at a high-level, the steps to develop a kernel with CSL. Also see CSL.
CSL code and runtime script
Developing a kernel constitutes the following:
Developing a CSL program, such as a
<filename>.cslthat defines the operations a PE or a set of PEs must perform. Often you will create multiplecslfiles. For example, see Multiple Source Files.Compiling the top-level
.cslprogram with thecslccompiler.Running the program, either with the simulator or on the Cerebras Wafer Scale Engine (WSE), using a runtime configuration script, usually written in Python, such as
code.csl.run.py. Here you will provide the input tensors to the simulator, andWhen the simulation is complete, read the simulator output and compare against a reference for validating the program output.
Kernel development steps
The following diagrams show the sequence of steps for developing a kernel.
Step 1
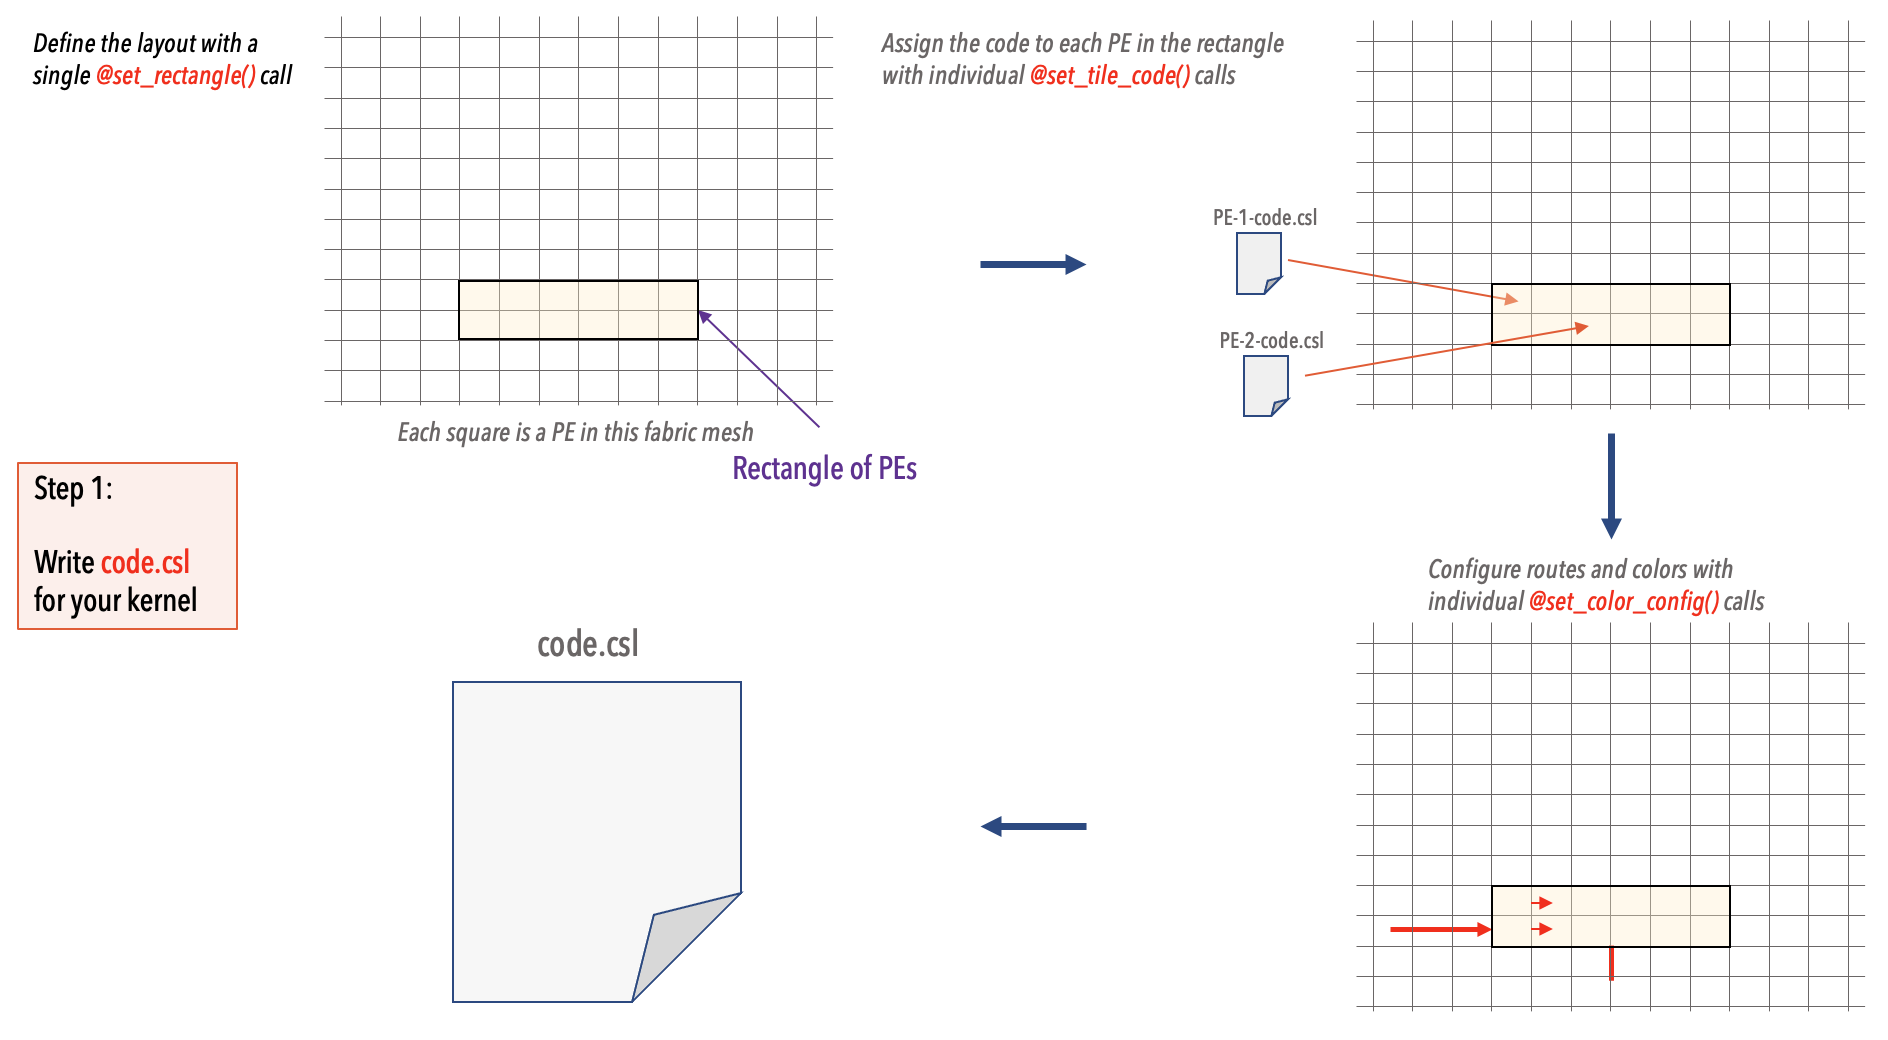
In your CSL code you must explicitly:
Define a layout by using
@set_rectangle()function. This defines a Rectangular region of contiguous processing elements (PEs).For each PE, use the
@set_tile_code()to define the code the PE will run.Configure the routes and colors with
@set_color_config().
Steps 2 and 3
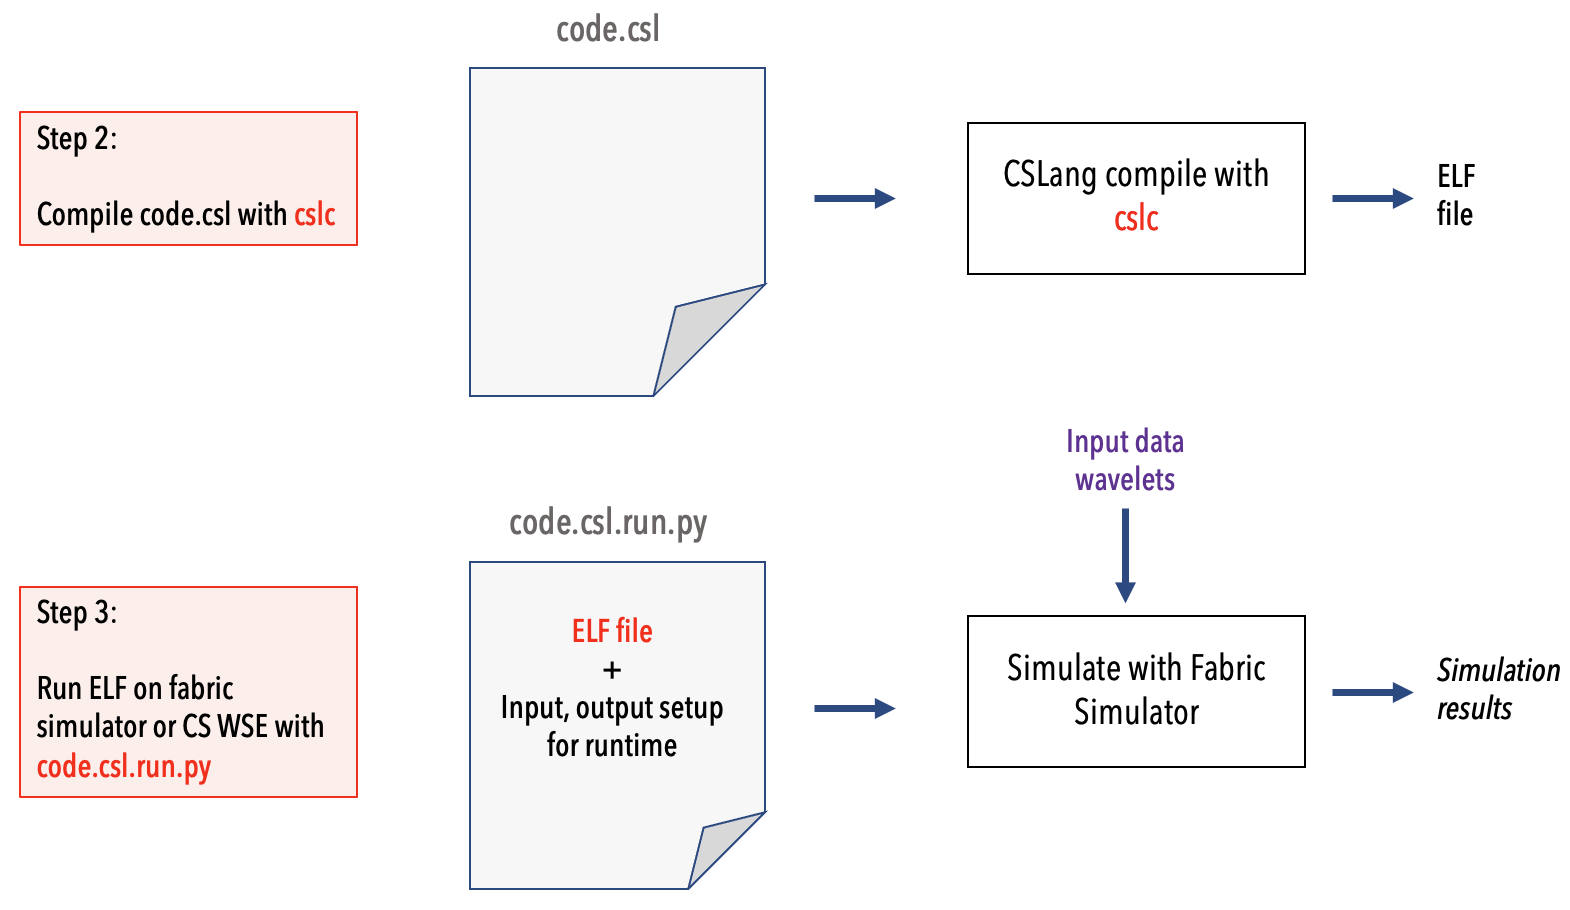
Next, you compile the top-level
code.cslwith the compiler toolcslc. This will generate a binary ELF file for each PE.Finally, use the runtime Python script
code.csl.run.pyto run the code either on the simulator or directly on the Cerebras WSE.
Note
The above flow is the same when you are targeting the actual network-attached Cerebras WSE accelerator device, except that Run step will target the network-attached CS WSE accelerator, instead of the local fabric simulator.
Example walkthrough
See Example and Working With Code Samples.